stamps
ink
sponge
glue stick
cardstock (cut to size you want for finished piece)
tissue paper (about 2" bigger than cardstock)
Step 1:
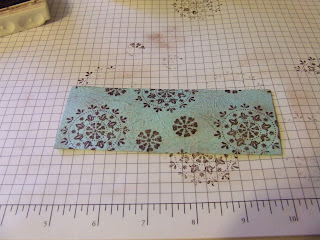
Stamp tissue paper.
Step 3:
Lay flat and sponge with ink.
Step 4:
Apply glue to one side of cardstock.
Place glue-side down on back of tissue paper.
Step 6:
Run a little glue around outside of cardstock.
Mitre corners.
Fold in sides, adding glue to ends if needed.
The colors are a little off in the picture, they are Chocolate Chip, Close to Cocoa, Really Rust and Very Vanilla. The patterned paper is Outlaw.
I hope you have fun with this technique :)
Have you been to Jill's blog Paper Memories yet? She has some blog candy and a fun challenge. I have some plans for her challenge but haven't done anything yet............I'll keep you posted.


5 comments:
Hi Karen,
Thanks for sharing the technique. I saw your card IRL and loved it but forgot how to do this technique. You are really great and doing these tutorials, I think you should try to get a spot on SCS. What do you think?
This card is just stunning. Thanks for the tutorial.
When you say "sponge" what exactly does that mean? Loved the card, and will try this technique when I hear back from you.
Oops, I should have said sponge with brown ink. I'm going to change that now. Thanks Sandra!
Hi been a while but wanting you to know that I'm still around. Racing done now....had the cold this week..so hope to get back to stamping next week. Love this card. Thanks for the tutorial and I think I will use it for my Stamp Camp on Oct. 13th. but I will prolly use BareBack. Miss ya and getting excited about scrapbook retreat.
Post a Comment