Wednesday, January 31, 2007
Pink purse
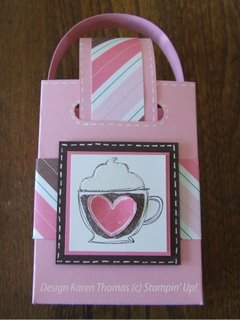
Finally, here is the bag I did for the Valentine's WOW swap. I have been trying to upload this since yesterday afternoon and I think it finally worked.
For this one I used pretty in pink, chocolate chip and the loves me paper. The coffee cup is from Like it a Latte. I stamped the cup and the whipped cream in chocolate chip and then used my versamark marker for the whipped cream and embossed it with winter white EP. I stamped the heart in regal rose and cut it out then used sticky strip on the middle only and then curled the sides of the heart a little to make it "pop".
I still have to make the cards to go inside but they will be fairly simple (they kind of have to be at this point) and they will all be with the loves me paper and the same colors of CS. I find that limiting the stamp sets and colors really helps to speed the process and can help your creativity "flow".
Monday, January 29, 2007
What was that?
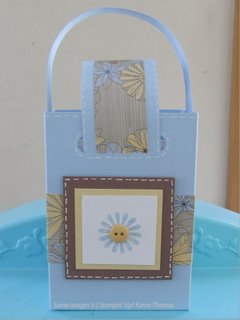
Did anyone guess right? It is a little purse that holds 6 note cards and envelopes. It would also be cute for a gift with chocolates or other little things in it. I found it on JanTink's blog and knew I had to case it. She has really great ideas and I quite often go there for inspiration.
I did one yesterday for a Valentine's WOW swap I am in this weekend. I will post it sometime this week 'cause it is just too cute not to share.
I also did 31 swap cards and have the base for another 5 ready (I mis-counted by a few) that I will probably finish once I figure out how many I need. The theme for this swap is Black and White so I used Polka Dots and Paisley with black gingham. I am really quite happy with it too so I guess I should show it off right? I will do that one day this week too. You know I like to keep you in suspense!
Keep checking back this week and I will have lots to share, I am going to take pics tomorrow of the swaps and the projects we did on Saturday so I will have them on my computer and no excuses :)
Tuesday, January 23, 2007
Sneak Peek
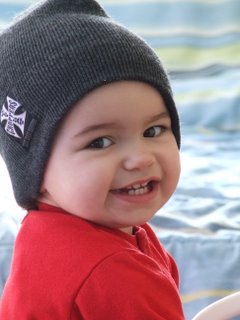
But first a picture of my little cutie with her Daddy's "American Choppers" hat on. She is saying "cheese". She loves having her picture taken now. Too bad she wouldn't have posed like this for the Christmas pictures I was trying to take. Oh well, maybe next year.
So here is the sneak peek but sorry you don't get to see the whole thing. One more little teaser is it is not a card.
I have been super busy trying to get ready for the party Friday night and class on Saturday. It has been over a month since we have had a stamp camp so I am really looking forward to a day of stamping. Hopefully I will have more to post later in the week. Maybe another sneak peek or maybe I will even have some time to play and show you something different. Wish me luck. I really should try to prepare a little more ahead but I do work well under pressure.
Wednesday, January 17, 2007
Pink Paisley Elephant
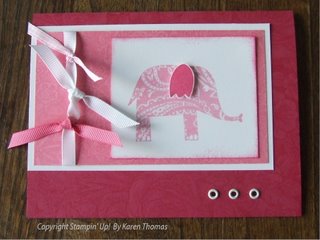
When I started this card I planned on using last weeks Sketch Challenge from SCS but once I got going I ended up changing it just a little and moving the white piece up and adding the eyelets. The elephant is "kissed" on the paisley background with Regal Rose and the ear is stamped in Rose Red, cut out and popped up with dimensionals. The Regal rose piece is stamped with Paisley and the rose red is stamped with Floral. For the ribbon I first tied the white on and then added the pink gingham and rose grosgrain.
I was talking to Dad earlier and he said to "stay warm" so I am passing it on to you cause it is really cold out there - Stay Warm and have a great day.
Btw- I wish Mom had waited another week to do her "Snow Dance" because Joe is away this week. After no snow all winter we get a storm the day after he leaves. Oh well, I do have good neighbors who plowed me out yesterday (I did shovel the night before but it wasn't really enough).
Tuesday, January 16, 2007
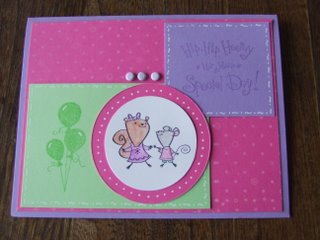
This is a card I did using the color challenge from last week and a sketch I found at Scrap Maps. They are great and have lots of sketches for scrapbook pages and cards. Another creativity booster.
The colors for this card are lavender lace, pink passion and gable green. These colors were different for me and I found myself wanting to use the white gel pen (lots) to soften the colors and tie it all together. The stamp sets are Hip Hip Hooray and Polka dots and Paisley (for the dots on the pink). I didn't have any brads in the colors I was using so I embossed them with versamark and lavender EP (they were silver brads). I found that when embossing on metal it doesn't take as long because it heats up faster and stays hot longer so be careful. Also tweezers are a must when embossing brads.
As you can see I am still on the white gel pen kick. We'll see if the next card has any on it.
Friday, January 12, 2007
Chocolate & Celery
This is one of the cards we did last night without the stickles (they were added to the centers of the flowers on top) and I had to change the ribbon cause I didn't have enough of this one for everyone.
The colors are chocolate chip, certainly celery, pink passion and apricot appeal. The flowers are stamped in white the dots are stamped in apricot appeal and the paisley is in certainly celery. I used my fav white gel pen on the paisley and it really made it "pop". The edges of the pink were cut with decorative edge scissors and that was popped up with dimensionals.
It was really nice to get back to class last night. I love getting out and seeing everyone once a week and to get to share my love of stamping with them is icing on the cake!
Thursday, January 11, 2007
Find Joy
I found this card on Splitcoast a fewdays ago when I was looking for some imspiration and had to CASE it. I love the choc. chip and brocade blue together. I seem to be in a white gel pen mood lately (anyone in my class tonight will see when I show them the cards) so this was right up my ally. The stamp set is the Polka dots and Paisley again, I forgot to say last time that it will be in the Spring Mini that comes out in March. I have been having fun with this set so I'm sure you'll see more cards with it in the near future.
I finally got ready for tonight's class last night. I had been working on the cards over the last few days but couldn't really decide which one to use. It was kind of funny to be prepping for a class again. The Christmas break was so long it seems like forever since I taught a class. I am really excited to see everyone tonight. BTW we are using Stickles for the first time tonight. I have had them since November and haven't used them and the card needed a little "bling" so they were perfect.
Tuesday, January 09, 2007
UHU and a new card
First off, I recieved these UHU products before Christmas and haven't had a chance to use them until a couple of nights ago. I found a link to Maria's Blog where she is giving free samples of UHU products to bloggers. When I finally had time to play the other night I gave them a try and this is what I found.
The Scrapbookers Pen: I liked the consistency of the adhesive,it was fast drying and I liked the hold it had but for me it was a little messy. It didn't buckle the cardstock or make it look wet and it did dry clear where I messed it up a bit :) I am definately going to use it some more and see if I can perfect the use of liquid glue. Oh yea, and the applicator for this was like no other one I have seen. It is kind of like a plastic chissled tip so it spreads the adhesive nicely.
The UHU Glue Roller: This was more my style (I normally use tape runner type adhesives) and went on really nicely.I used this one for the card below and it held quite good. The application was really smooth, I had no problems with it skipping or anything. I will be using this one more too for sure.
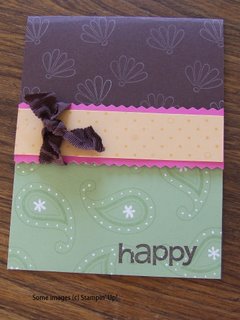
This card was inspired by the patterened paper I had on my desk from a tin I did for Mom or Amy (I can't remember whose it was 'cause I did one for each of them for Christmas and yes I need to clean my desk). Anyway, I used another sketch challenge for the layout and the colors came from the paper. It is hard to see in the picture but the verse in the lower left corner says "simply said from the heart - thank you. I have had Simply Said for quite a while but haven't used it much so I did this card and 1 more (that I will use for class this week).
I think that will be my goal over the next little while- to use some of the sets I haven't used in a while. But of course I need to use some of my new ones too so I guess I have lots of stamping to do :o)
Saturday, January 06, 2007
Faux Button Tutorial
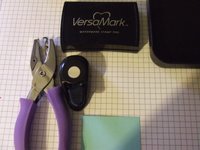
Supplies:
cardstock
1/16" punch
1/2" punch
white gel pen
versamark pad
glassy glaze or Utee
heat tool
tweezers
powder pal (optional)
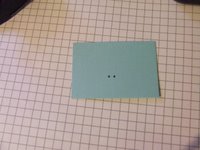
Step 1:
Punch 2 holes with 1/16" punch fairly close together.
Step 2:
Punch 1/2" circle around 2 smaller holes.
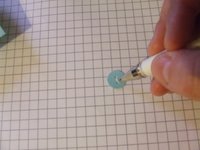
Step 3:
Draw "stitch" between holes with white gel pen.
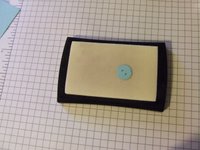
Step 4:
Press into versamark pad
Step 5:
Press into glassy glaze, remove with tweezers then heat.
Step 6:
Finished button.
Step 7:
Add to card.
This is the first card I have made in weeks and it took way too long to make and it had nothing to do with the button. I guess I need to do lots more stamping this weekend to get going again.
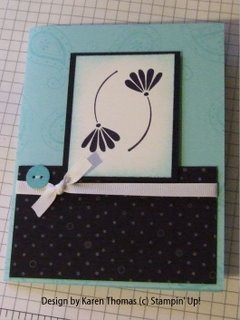
I used both sketch and color challenges from SCS to help me along. I can't remember what sketch it was but the color challenge was from this week ( Cool Carribean, Basic Black and Whisper White). The stamp set is the free one we got from Stampin' Up! called Polka Dots and Paisley. Very cool.
Thursday, January 04, 2007
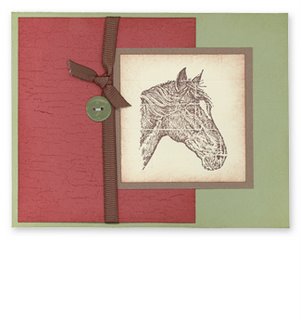
My card is on Stampin' Up!
I just found it when I was doing my regular check for the highlights from the Regionals in October. I was thinking Mom or I might be in a picture but never expected my card would be there!
This is the card I demoed with the faux button. I was going to give the directions here but I think I will attempt a tutorial with pictures. I am going to do some stamping today so I will do it then.
The image of the horse is done with the reverse grid technique. I just did a searc for it as well and couldn't find it on SCS so I will either do another tutorial or give the directions later.
Gotta go get some cleaning done so I can stamp later.
Subscribe to:
Posts (Atom)